How to Install a KNX Smart Home Panel in a Standard 86 Type Wall Box
Installing a KNX smart home panel is an essential step in establishing a fully automated smart home or commercial building. If you are utilizing a standard 86 type wall box, the installation process is simple with the appropriate tools and instructions. This guide outlines the steps to install a KNX smart home panel safely and effectively.
What is a KNX Smart Home Panel?
A KNX smart home panel serves as a touchscreen interface that enables centralized management of:
- Lighting and dimmers
- HVAC systems
- Blinds and shutters
- Energy management
- Security devices
It connects to the KNX network, facilitating the automation of scenes, energy monitoring, and control of multiple devices from a single interface.
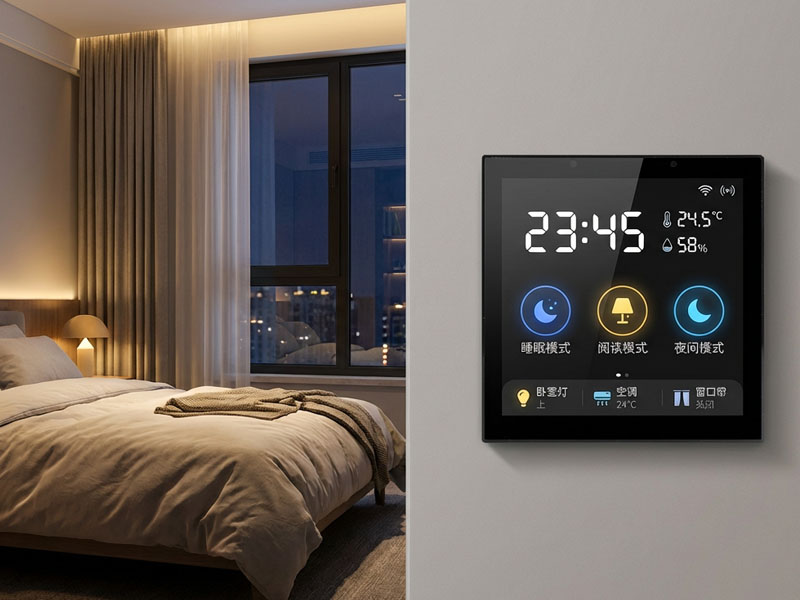
4″ KNX Smart Touch Control Panel
Tools and Materials Needed
Prior to commencing the installation, ensure you have the following items:
- KNX smart home panel (e.g., Portworld YC-SM41P-KNX or YC-SM1011)
- Standard 86 type wall box
- Screwdriver set
- Ethernet cable (if using PoE) or KNX bus cable
- Level tool for accurate alignment
- Wall anchors (if necessary)
Step-by-Step Installation Manual
Step 1: Prepare the Wall Box
- Ensure that the 86 type wall box is properly installed and positioned at the desired height.
- Confirm that the KNX bus cable or PoE Ethernet cable is readily accessible.
- Verify that there is sufficient space for the panel’s depth and for ventilation.
Step 2: Connect the KNX/Power Cables
- Attach the KNX bus cable to the panel’s KNX port.
- If utilizing Power over Ethernet (PoE), connect the RJ45 cable to the Ethernet port.
- Ensure that all connections are secure and that no wires are exposed.
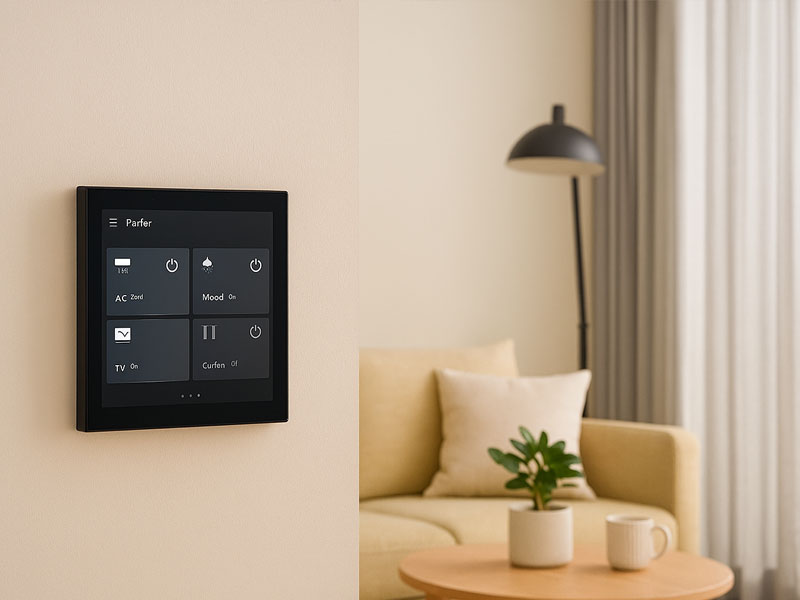
4″ Smart Home Touch Control Panel
Step 3: Mount the Panel
- Carefully align the panel with the wall box.
- Utilize screws or mounting brackets supplied by the manufacturer.
- Confirm that the panel is flush with the wall and is level.
Step 4: Power On and Configure
- Activate the power or PoE supply.
- The panel will initiate its boot process.
- Connect the panel to the KNX network using ETS6 software for configuration purposes.
- Assign group addresses and set up control functions for lighting, HVAC, and blinds.
Step 5: Test Functionality
- Evaluate all touch functions, including swipe, tap, and zoom.
- Ensure that lights, HVAC, and other connected devices respond appropriately.
- Modify settings or scenes as necessary using the panel interface or ETS6.
Tips for a Successful Installation
- Use a level tool to ensure the panel is perfectly aligned.
- Always turn off power before wiring to prevent short circuits.
- Check manufacturer instructions for specific mounting brackets or optional sensors.
- Keep the KNX bus cable and PoE cable organized inside the wall box for easy maintenance.
- Regularly update the panel firmware for optimal performance.
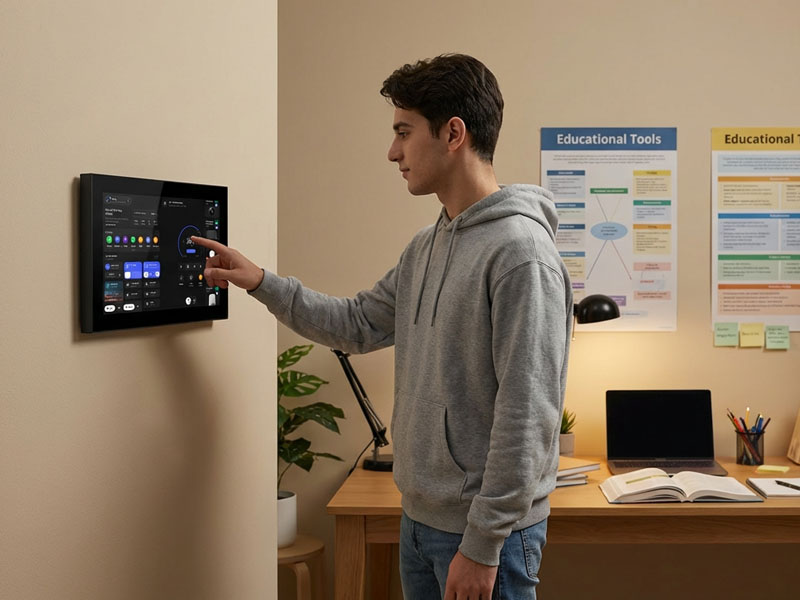
10 inch smart home control panel
Why Choose Portworld KNX Smart Panels?
Portworld KNX panels are ideal for home and commercial automation:
- Compatible with standard 86 type wall boxes
- High-performance RK3566/RK3568 processors
- Supports Android 13, Linux, or Debian
- Optional Zigbee gateway integration
- Customizable OEM/ODM solutions for hotels, offices, and smart homes
With Portworld, installing a KNX smart panel is easy, efficient, and future-proof.
Installing a KNX smart home panel in a standard 86 type wall box is a simple and effective way to centralize lighting, HVAC, and automation control. Following these steps ensures a clean, professional installation while enabling energy-efficient, intelligent smart home management.
Upgrade your home or building with a Portworld KNX smart panel and experience the convenience of full automation at your fingertips.


