How to Install a Smart Touch Control Panel at Home
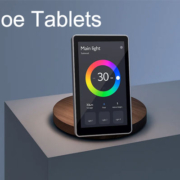
Installing a smart touch control panel at home is a great way to centralize control of lighting, HVAC, curtains, door access, and more — all from a sleek, wall-mounted interface. Whether you’re a homeowner, DIY enthusiast, or working with a professional installer, this guide will walk you through the basic steps for setting up a smart touch panel.
What You’ll Need
Before starting the installation, ensure you have:
- A smart touch control panel (Android-based, PoE or DC powered)
- A compatible wall box (usually 86-type or custom cut-out)
- Power supply (PoE injector/switch or DC adapter)
- Internet access (via Wi-Fi or LAN cable)
- A screwdriver and level tool
- Optional: RS485 or relay wiring if integrating with smart systems
Step 1: Choose the Right Location
Select a spot that’s easily accessible and central to your home automation system. Consider:
- Near entryways, living rooms, or main halls
- At eye level for comfortable touch interaction (typically 135–150cm from the floor)
- Close to power and network sources
Make sure the wall is free of internal pipes or obstructions.
Step 2: Prepare the Wall Box
Most smart panels are designed to fit standard 86-type wall boxes. If you’re upgrading from a light switch, check the size and depth.
- If needed, install a new box with sufficient depth (usually 50–60mm)
- Ensure the box is securely mounted and flush with the wall surface
- Pull the required power and network cables through the box (DC cable or CAT5e/CAT6 for PoE)
Step 3: Connect Power and Network
Smart home control panels are typically powered in one of two ways:
- PoE (Power over Ethernet): Connect the RJ45 cable from a PoE switch or injector. This provides both power and internet in a single cable.
- DC Power (12V/24V): Connect the power adapter or wiring to the DC input terminal.
For network access:
- Connect via LAN cable for more stability
- Or use built-in Wi-Fi (configure later during software setup)
Step 4: Mount the Panel
- Align the panel bracket with the wall box
- Use screws to secure the bracket to the box
- Connect power/network cables to the back of the panel
- Gently press the panel into place until it clicks or locks
- Use a level tool to ensure it’s straight
Step 5: Initial Software Setup
Once powered on, follow the on-screen setup:
- Select language and connect to Wi-Fi (if not using LAN)
- Install or configure your smart home app (custom UI, Home Assistant, KNX, etc.)
- Pair with smart devices or a central controller
- Set screen timeout, brightness, and standby mode
Most Android-based panels like Portworld’s YC-SM08P or YC-SM10P come with open SDK or pre-installed control apps for easy integration.
Step 6: Test the System
Check each function:
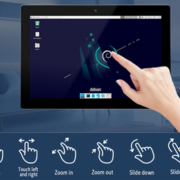
- Touch responsiveness and screen calibration
- Connectivity (LAN/Wi-Fi, RS485/relay if used)
- App interface and linked devices (lights, curtains, sensors, etc.)
- Power stability and idle power consumption
Make sure everything works as expected before finalizing installation.

