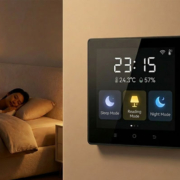
How to Build a Smart Home Control Panel
In the era of the Internet of Things (IoT), a smart home control panel can serve as the “command center” for all your household devices. It allows you to easily manage lighting, air conditioning, security systems, and entertainment from a single interface. Building your own smart control panel not only saves costs but also lets you fully customize its functions. Here’s a detailed guide to help you build your own.
1. Define Your Needs and Functions
Before you start, it’s important to define what functions your control panel should have:
- Device Control: Control devices like lighting, curtains, air conditioning, and outlets.
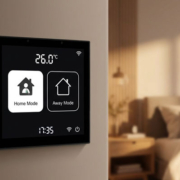
- Scene Modes: Such as “Home Mode” (automatically turning on lights and adjusting temperature) or “Sleep Mode” (turning off all devices).
- Voice/Remote Control: Supports voice assistants or mobile app control from anywhere.
- Security Monitoring: Monitor door lock status, camera feeds, and more.
2. Choose Core Hardware
1. Main Control Device
- Portworld (PortPi): Affordable, with great community support, suitable for DIY.
- ESP32/ESP8266: Low-cost Wi-Fi modules ideal for simple control.
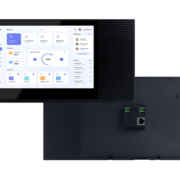
- Ready-made Smart Control Devices: Such as Home Assistant’s recommended devices or Portworld’s smart home control panel solutions (eliminating the need to build everything from scratch).
2. Display (Optional)
- Touchscreen: 7-inch HDMI touchscreen (suitable for wall mounting).
- Tablet/Old Smartphone: Install control apps like Home Assistant, Mi Home, etc.
3. Communication Protocol
- Wi-Fi/Bluetooth: Common for most smart devices (e.g., Mi Home, Tuya).
- Zigbee/Z-Wave: Low power consumption, ideal for sensors and door locks (requires a gateway).
3. Set Up the Software System
Option 1: Using Home Assistant (Recommended)
- Install the System: Flash Home Assistant OS onto a Raspberry Pi, Portworld PortPi, or other development boards (or use Docker).
- Connect Devices: Integrate devices like Mi Home, Tuya, Aqara using official integrations or HACS plugins.
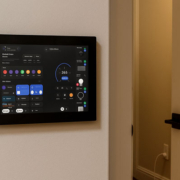
- Design UI: Customize the dashboard using Lovelace, or install pre-built themes (e.g., “iOS-style”).
- Voice Control: Integrate with XiaoAi, Alexa, or Google Assistant.
Option 2: Use Portworld’s Smart Home Solutions
- Portworld may offer customizable control panel software that can be deployed directly on their hardware.
- Supports various protocols and is ideal for enterprise-level or high-end users.
- Typically offers better stability and technical support.
Option 3: Self-developed Web Control Panel
- Use Python (Flask/Django) with MQTT protocol for backend development.
- Frontend can be built with HTML, CSS, and JavaScript, optimized for both mobile and touchscreen displays.
4. Installation and Debugging
- Mounting the Devices: Embed the development board and screen into the wall or place it on a desktop stand.
- Power Supply: It’s recommended to use PoE (Power over Ethernet) or a hidden power cable.
- Network Optimization: Ensure stable Wi-Fi signals, and make sure Zigbee devices are within range of the gateway.
- Automation Testing: Set up automation rules (e.g., “Turn on the lights when the motion sensor is triggered”).
5. Advanced Optimizations
- Local Deployment: Reduce dependency on cloud services to improve response times (e.g., use Node-RED for automation).
- Energy Data Statistics: Record energy consumption data and generate usage reports.
- Facial Recognition: Implement smart access control using cameras.
- 3D-Printed Enclosures: Create customized cases for a personalized look.
6. Security Considerations
- Change default passwords and enable HTTPS encryption for access.
- Regularly update system patches to prevent vulnerabilities.
- For critical devices (e.g., door locks), consider keeping a physical switch as a backup.


